Thursday, April 18, 2013

Balloon Mapping II

Introduction: This is part 2 of the Balloon Mapping project that was started in Exercise 3, or Balloon Mapping I of this blog. In part 1 we designed and tested various ideas for the Balloon Mapping as well as the HABL(High Altitude Balloon Launch). Now it was time to use our ideas to launch a balloon to do take some images of the campus.

Methodology: Due to the fact that there needed to be different tasks completed to make the launch happen, the class was split into different groups. Some were put in charge to fill the balloon, some needed to measure out 50 foot lengths on our balloon string, a videographer and photographer.
We measured out 50 foot sections of the string that would be holding the balloon. Our goal was to have the balloon 400 feet up into the air. Though, as you will later see, the wind did not allow the balloon to get that high.
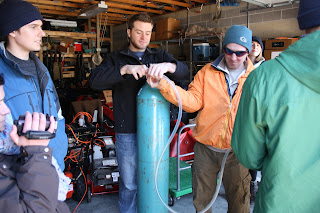
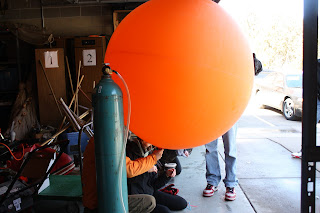
Helium tank
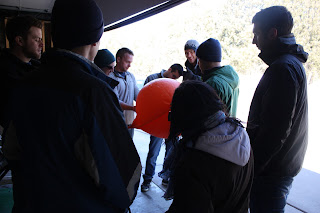
Starting to fill up balloon


It's getting bigger!

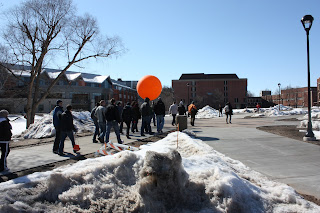
On our way to let the balloon go.

 We attached a GPS unit to the balloon to record a Tracklog of where the balloon had been.
Dr. Hupy is seen here attaching the GPS unit to the balloon. You can also see the little styrofoam container that housed the camera.

Of course, on the day of the launch, the weather was not cooperating much. It was about 30 degrees and very windy. The picture below does a good job showing how much of an angle the balloon was at in regards to where we were standing. Thus, dramatically lowering the altitude we hoped to get the balloon up to.
After the initial launch we decided to go back in and fill the balloon again, but with more helium, hoping that we could get more elevation despite the strong wind.

The second time we used both the camera and video camera.
Adding more helium to the balloon seemed to help. But, the wind was still strong and quite gusty at times. Regardless, we decided to take a walk around campus and even over the bridge that crosses the Chippewa River. When we got across the river we started to notice that the balloon seemed to be losing air. And then it all went down hill from there. The styrofoam box holding the camera actually fell from the balloon plummeting down into the icy cold Chippewa River. Luckily, prior to the second launch we decided not to attach the GPS because we did not wanted the added weight, otherwise I think we would have been down a GPS.

The video above shows not only the camera falling into the river, but it also shows how windy it was. The camera apparatus can be seen violently moving around.
Now, the whole point of sending a camera and a video camera 400 feet up into the air was to take photos and video of the surrounding landscape. The video is pretty straight forward.

But the photos needed to be mosiaced to try and come up with an image of the university grounds.
For those that are unfamiliar with what a mosiac is, it is an assemblage of smaller images to create one large image.

Mosiacing:
As seen in the video above, the wind really affected the quality of photos/video taken. A lot of the photos were of the horizon, not the ground. And the ones of the ground were not taken with the camera at a 90 degree angle to the ground. Here are some examples.
The photo above is not really the horizon, but it is pretty useless when trying to use it for mosiacing.
The beautiful Horizon.

With my limited experience in creating a mosiac, map creation in general and the distorted images, I tried my best to come up with a mosiac.

Nice huh?
Image of the area I was trying to Mosaic


Discussion: Once again this was a good experience. The weather was frustrating and luckily it only cost us a balloon and not a camera.

Conclusion: Well the weather really effected how everything turned out. The mosaicing was extremely difficult. Obviously  it would be better to do it on a nice day, but with everybodies schedule it would be difficult to reschedule. But, this experience gave us ideas no how to do it differently next time.

Wednesday, April 17, 2013

Navigation with GPS and Map

Introduction: This weeks activity was a continuation of the last three weeks. This time we were to track down all the flags with the help of a GPS and our map. But, there was  new twist, everybody was armed with paintball guns. Everybody was split into their teams of three once again, but we were not given a certain course, or set of flags, that we were to set out and find. This time we were to find all of the flags in any order we so choose. The only determining factor for which flags we should find first was to try and steer clear of other groups and their paintball guns.

Methodology: The first thing that we had to do was to update our existing maps. We had to add all of the flag points as well as the no shooting zones. Once again this was at the Priory, which is a public place and has a day care.
Updated map with the No Shooting Zone as well as all the Waypoints(flags)
Now that we had the map all ready to go, it was time to head over to the Priory and get our weapons and analyze the map to see what our best route would be. There were also some simple rules. We had 5 minutes to get to our starting piont with no shooting. If someone was shot in your team you had to wait 2 minutes in the spot of being hit. Also, obvious safety issues like don't shoot at somebody with no mask on and in general don't be cruel.

Choose your weapon.
Snowshoes were supplied, but were optional.
 
Ready to go.
Punch card for proving we reached that specific flag.
The waypoint flag with the punch hanging below.

We all picked out a gun and face mask and we all chose to wear snow shoes. The last time we were out here the snow was about 2 feet deep and pretty exhuasting to walk through. My one concern was walking through brush with the snow shoes, but they proved to be a life saver.
Once we were all dressed and ready to go we analyzed the map and tried to chose an efficeint route that would limit walking distance as well as an initial shoot out. I can't speak for everybody, but I was ok with not getting hit with paintballs right away..
The goal was to get to each coursepoint, punch our card, record a waypoint on our GPS and be the first to hit each coursepoint and return to the starting point.
We chose to start in the southwest corner at waypoint #2. We then worked our way around the largest no shooting zone in a kind of backwards C direction.
Map with the course points labeled.
We eventually ended up over by waypoint 14 at the end.
 
 
The map above shows my tracklog from my GPS and also each waypoint I took.

We were not able to make each course point due to time. With other teams shooting at us, it probably slowed us down by about 45 minutes to 1 hour.
Final map our whole groups Tracklogs and Waypoints.
 
 
Discussion: From the looking at the groups tracklog we stayed pretty much on direct routes to each flag. We relied on our maps heavily and only used the GPS tracking if we were unsure that we were heading in the right direction. The contour lines n our map proved to be absolutly priceless when trying to get a bearing on where we were at. We did have two skirmishes with two groups, this can be seen by the two spots were many tracklog points are consolidated together. Points 3 and 12 as seen below.


Conclusion: I thought this was fun and creative way to put together everything we have learned about navigating. I was able to get some more hands on experience with GPS devices. I was also able to implement UTM coordinate systems in a real life situation. While out on this exercise, I could not help but think what it must be like to actually be out in some hellish terrain while being shot at with real bullets. It was exhausting enough navigating through brush and steep elevation changes, to have somebody trying to kill you while doing so must truly be a nightmare.
I know that the point of this exercise was to navigate, but it would have been fun to be in a smaller area, so the 'fighting' would be a little more intense.
 

Monday, April 1, 2013

GPS Navigation

Introduction: For this exercise we had to navigate to 6 new points using only GPS Devices. Using only latitude and longitude as our guide, compass' and maps prove to be a very important tool. The points that we navigated to were also new, giving us a new terrain and area that we were unfamiliar with.


List of Latitude/Longitude Points.

The 18 points on the paper above are separated into 3 courses, 6 points to each course. Each group is given a course to follow. This week we had points 1-6.

GPS unit used, along with coordinates.
 

Methodology:

Differing from using a compass and map, using only GPS coordinates to navigate terrain proved to be quite difficult. Besides the difficulty of making sure that we were headed in the correct latitude/longitude direction, there was about 2 feet of snow. Now if there was 2 feet of snow and you knew exactly what direction you needed to go, that would be difficult enough. When you have 2 feet of snow and you walk 20 yards to find out you are walking in the wrong direction, it can be quite frustrating. When I first created the image below I was quite surprised how my route actually looks quite simple. I remember the route being rather difficult and remember doing a lot of back tracking trying to get back in the right lat/long direction.


Chuck Peterson Route
Group Route
With the dramatic terrain at the Priory, I found myself wishing for a topography map more than a compass. For the most part, you can get a good bearing of where you are at in regards to elevations changes in this area.
Besides the difficulty of the snow, our group soon came up with a system. We split the responsibilities up between the three of us. One person concentrated on latitude, one on longitude and the last person checked on both lat/long and kept an eye out for the flag. With the foliage off of the trees, it gave us a good chance to spot the flag even though it was quite aways off. In fact, at one point later in the exercise we went to the wrong flag. It was a mistake due to fatigue and we got lazy and didn't even check our GPS to see if we were going in the right direction.

Discussion: This was a good exercise in the regards to comparing navigating with a GPS in contrast to using topology maps and a compass. As Dr. Hupy has repeated this semester you have to be able to adjust to technology breakdowns. Indeed, this was a good example of a situation wear the older technology would prove to be more useful.

Conclusion: I think this exercise really drove home the point of the importance of having various forms of navigation. With my limited experience with GPS device I can see their importance and usefulness. That being said, I can see that they are not a good stand alone navigation device.