Monday, March 11, 2013

Field Navigation

Introduction: This week we went out to the Priory to use our navigation maps that we created last week. The goal was to use the tools and methods that we practiced and learned the previous week.

Methods: The first thing that needed to be done was to plot the points given to us using the UTM grid coordinates.
The list of points needed to be plotted.
We were on Course 3, so we had to plot the last 6 points on the list above. The list gives a X and Y coordinate, so it was very simple plotting the points on the map. We simply lined up the X and Y coordinate and drew a X to mark the point. Two groups were on each course, so one group went from point 1 to 6 and we went from point 1 to 6 then 6 to 5 and so on back to 1. For measuring distance we simply took an edge of paper marked the distance markers from our navigation map. That gave us a make-shift ruler that had intervals of 20 meters.


Measuring distance between 2 points.
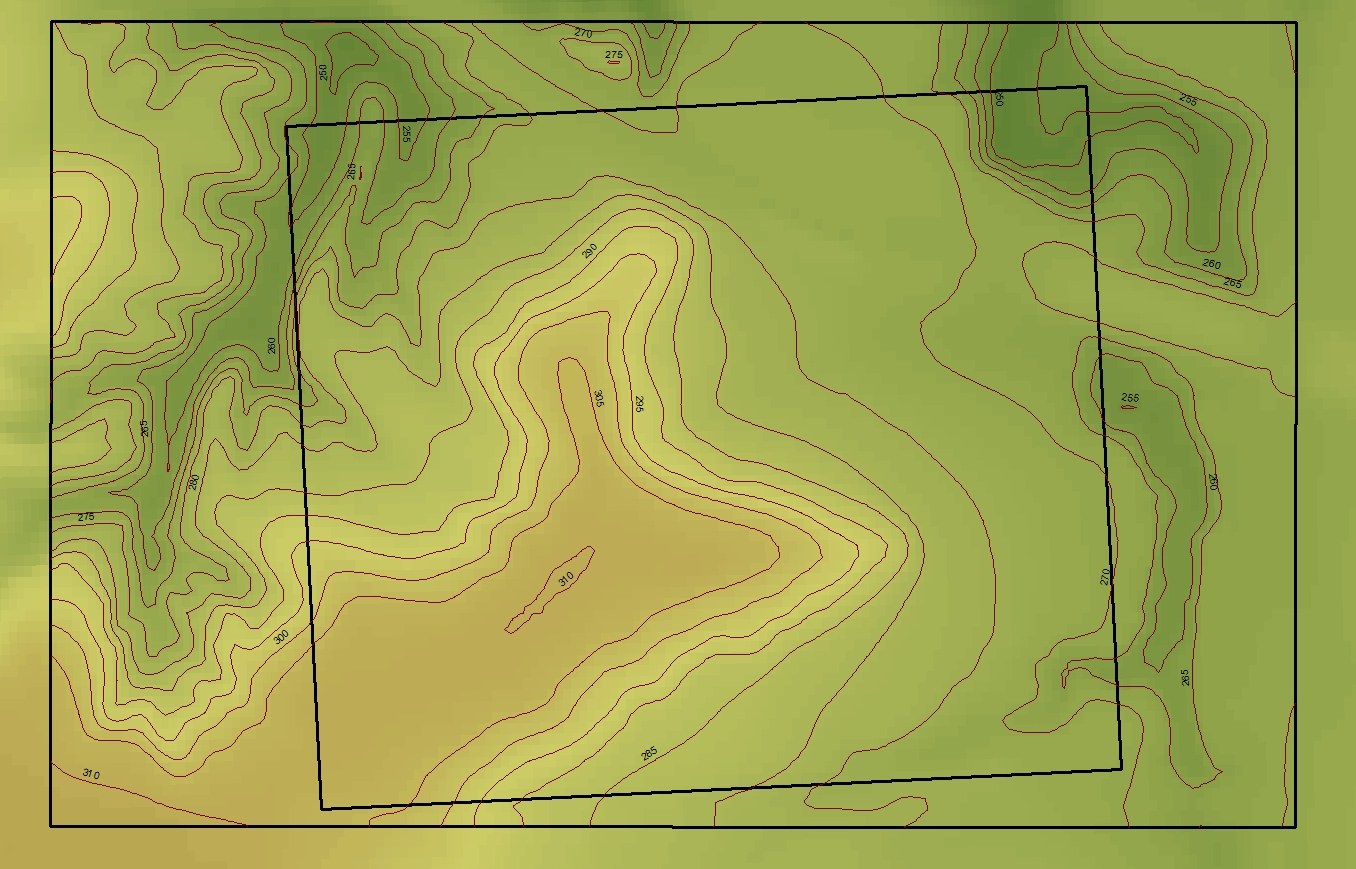


Image of just the grid.


We then had to take the azimuth with a compass. This was the first time I used a compass so it was something I had wanted to learn for some time. Here is a picture of the kind of compass we used so I can refer to it.
Example of the compass we used.

After marking the points on the navigation map, you align the compass on two points. The red arrow needs to point in the direction that you intend to walk. For example our measurement from point 1 to 6. You align the starting point(point1) at the bottom of the compass. You then point the arrow to point 6. While you are doing this your needle will continue to point to magnetic north. You then put the 'red in the shed', which means you turn you azimuth ring so the orienting arrow aligns with the magnetic needle.
Image of a compass with some technical terms for reference.
Taking a Azimuth reading.

Our points with Azimuth and Distance.
We had our points plotted, distance and azimuth reading so we are ready for the field. Our first point was a tree where we met on of Dr. Hupy's helpers, Al. Al helped us get started by just confirming we were pointed in the right direction. We set our compass to 350 degrees and stood so the red was in the shed. We all agreed on a medium sized pine tree to use as a land mark that we could walk and take a new reading. We all walked to the tree counting our paces. Once we got to the tree we decided to just send one person ahead so the two who stayed back could confirm they were staying somewhat on the Azimuth reading. Nick took the lead and set out to pace 100 meters. Once he got close to the 100 meters he called out saying he had found the flag for point 6.
The image above shows Nick going forward from our first meeting point at the pine tree. Tonya and I stayed back to be sure he stayed on the right course.

For the rest of our points we pretty much did the same thing.
1. We took the azimuth of the current point.
2a. Sent one person ahead to pace 100 meters while we stayed back to confirm they 'runner' was staying on track.
2b. If there was a good landmark in the azimuth direction we would all just go to that landmark and retake the azimuth reading.
3. Once the runner would reach their 100 meter position everybody would come ahead to discuss the position and discuss whether we agreed on the position. With the brush and difficult terrain, due to peaks and valleys in the landscape, it was easy to get off course from the starting point. Usually the person who stayed back at the starting point had a good idea whether we were off or not.
4. We would then take another azimuth reading and send a runner ahead.
5. Once the flag was found the runner would usually yell to let us know to come ahead.
The image above shows Nick and Tonya have found the first flag.

Discussion: For the most part our distances and azimuth readings were pretty good. We used the map surprisingly little. If we found a flag that was obviously on a peak or in a valley we would confirm with our topographic map. As for the aerial map, I don't remember looking at it one time. The aerial map would have worked nice because one of our readings brought us through an area that was planted with pine trees. But, for the most part I think our group felt pretty confident where we were,that we relied on our readings.
The steep terrain did make it difficult staying on a azimuth reading for 100 meters. Which is why Dr. Hupy suggested we keep one person back to confirm that the runner is staying on track. The somewhat deep snow and brush was a little less of a hindrance for keeping on track, but they were definitely annoying.

Conclusion: I think it would be fun to do something like this on a bigger scale. I think our group may have been a little careless at times by walking ahead too soon and not keeping a person back at the meeting point all the time. If we were doing this in a more deselot place with harder terrain and more acreage, we could find ourselves in some trouble. Making a mistake doing something like this could be a real pain, because it takes significant amount of energy to trudge through the woods with 12" of snow(not to mention prickly ash and buckthorn).
I did learn a lot from this activity, and unlike Calculus, I can see myself using this experience in the future. It's pretty amazing that somebody majoring in Ecology and an avid outdoors kind of guy, can get away with never using a compass until his senior year in college.

Wednesday, March 6, 2013

Field Navigation Map

Introduction: The purpose of this exercise was to create a Field Navigation Map that will be used next week when we take actual measurements at the location. We will then use the map to plot points given to us by Dr. Hupy that we will have to manually polot on the map. To prepare for the field work we needed both a useable map, that would be easy to read, as well as a way to measure distance. The following outlines what was done to prepare for our field work.

Method: The first step in our creation of a Field Navigation Map was not a reference map, but actually a crude method of measurement. To come up with this method each student walked 100 meters 4 times and recorded their pace count. Then, from each group, the person with the most consistent pace count won the job of measuring the distances. My pace counts came up 69x3 and 68.
We then went inside to start making a reference map that we could bring out into the field with us.


The first thing was to add the aerial map to ArcMAP. By adding this basemap first we are able to add any additional layers and they will 'project on the fly' to the appropriate projection. The area of interest(AOI) is the Priory in Eau Claire, WI.
Here is the aerial picture with the boundaries and grid already added to the area of interest(AOI).
 
Zoomed in view of the AOI with boundaries added

After adding the basemap and boundaries the next step was to make two maps. One map was to be just a reference map that you could refer to when out in the field. Purpose of the reference map is mostly to be able to get a bearing of your location by landmarks, tree lines, etc. Along with general landmarks we also wanted some general topology and a grid system for further reference.
AOI with 5 foot contour lines

Grid overlay

With the basics of a basemap, boundaries, contour and grid overlay I was able to make a basic reference map and a basic topological map.
The idea behind a basic topologcial map is just to give a general idea of topology as well as being able to use it for marking points and any notes you may have. Our group actually decided to use another map with no color background to further simplify it.
Above is a basic map with the 2 foot contour. It is clearly more dramatic looking when it comes to the peaks and valleys that is at the AOI.

Discussion: This was just the first part before actually going out into the field and doing some navigation and work. As in all other exercises in this class, the repeated theme is to be prepared before going out to do your field work. This exercise was no exception. It was important to have a workable base map with usable data on it like the grid and contour as well as having a somewhat accurate way to measure distance.

Conclusion: I think this was a good start prior to doing the actual field work. It also gave me some more experience with dealing with map projections.