Methods: The first thing that needed to be done was to plot the points given to us using the UTM grid coordinates.
 |
| The list of points needed to be plotted. |
 |
| Measuring distance between 2 points. |
.JPG) |
| Image of just the grid. |
We then had to take the azimuth with a compass. This was the first time I used a compass so it was something I had wanted to learn for some time. Here is a picture of the kind of compass we used so I can refer to it.
 |
| Example of the compass we used. |
 |
| Image of a compass with some technical terms for reference. |
 |
| Taking a Azimuth reading. |
 |
| Our points with Azimuth and Distance. |
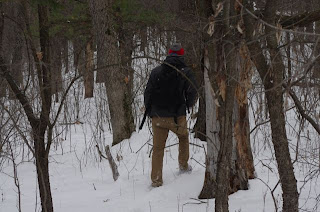
The image above shows Nick going forward from our first meeting point at the pine tree. Tonya and I stayed back to be sure he stayed on the right course.
For the rest of our points we pretty much did the same thing.
1. We took the azimuth of the current point.
2a. Sent one person ahead to pace 100 meters while we stayed back to confirm they 'runner' was staying on track.
2b. If there was a good landmark in the azimuth direction we would all just go to that landmark and retake the azimuth reading.
3. Once the runner would reach their 100 meter position everybody would come ahead to discuss the position and discuss whether we agreed on the position. With the brush and difficult terrain, due to peaks and valleys in the landscape, it was easy to get off course from the starting point. Usually the person who stayed back at the starting point had a good idea whether we were off or not.
4. We would then take another azimuth reading and send a runner ahead.
5. Once the flag was found the runner would usually yell to let us know to come ahead.
The image above shows Nick and Tonya have found the first flag.
Discussion: For the most part our distances and azimuth readings were pretty good. We used the map surprisingly little. If we found a flag that was obviously on a peak or in a valley we would confirm with our topographic map. As for the aerial map, I don't remember looking at it one time. The aerial map would have worked nice because one of our readings brought us through an area that was planted with pine trees. But, for the most part I think our group felt pretty confident where we were,that we relied on our readings.
The steep terrain did make it difficult staying on a azimuth reading for 100 meters. Which is why Dr. Hupy suggested we keep one person back to confirm that the runner is staying on track. The somewhat deep snow and brush was a little less of a hindrance for keeping on track, but they were definitely annoying.
Conclusion: I think it would be fun to do something like this on a bigger scale. I think our group may have been a little careless at times by walking ahead too soon and not keeping a person back at the meeting point all the time. If we were doing this in a more deselot place with harder terrain and more acreage, we could find ourselves in some trouble. Making a mistake doing something like this could be a real pain, because it takes significant amount of energy to trudge through the woods with 12" of snow(not to mention prickly ash and buckthorn).
I did learn a lot from this activity, and unlike Calculus, I can see myself using this experience in the future. It's pretty amazing that somebody majoring in Ecology and an avid outdoors kind of guy, can get away with never using a compass until his senior year in college.


No comments:
Post a Comment