 |
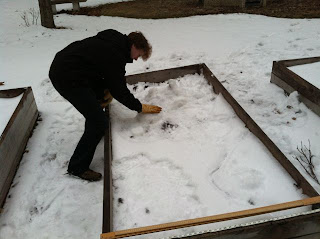
| Zach doing some landscaping |
Goal: Create a Digital Elevation Surface with a couple yardsticks, paper and a pencil.
The first thing we did to create our Digital Elevation Surface was to custom make the topography with snow that was in our 'sandbox' as well as added some for our mountain. We created valleys, plains, mountains, cliffs and a plateau.
We then placed a yard stick across the sandbox as a make shift sea level indicator to measure our Z-coordinates. On top of the yard stick was a meter stick so we could measure our elevation every 10 cm along the XY axes. This stick started at the bottom of our make shift grid and moved up the Y axis every 10 cm. This was are way of making our own little Cartesian Coordinate System. For every 10 cm on the Y axis, we then recorded data every 10 cm across the X axis.
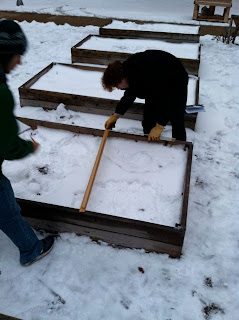 |
| Zach moving the yard stick 10 centimeters North |
|
|
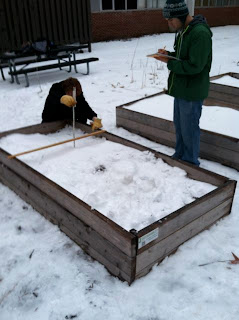 |
| Zack measuring Z-Coordinates while Joe recorded data |
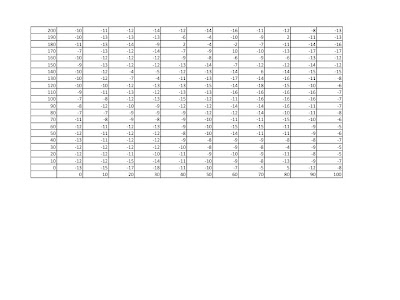 |
| Our Data |
For the most part I think we had the right idea in how to obtain, collect and record the data. With the limited amount of tools and time, we made a accurate yet crude elevation model. I do feel we probably should have collected data at every 5 cm(or more) instead of 10 cm. When this data is added ArcGIS, the dramatic inclines and declines that were part of the landscape will probably not show up. I guess they'll show up, but a lot can happen in 10 cm on a 100 cm X 200 cm landscape. That being said, this exercise is obviously an introduction to a bigger idea and practice. Things that I would do differently would be measurements every 5 cm and more pictures from different angles of the landscape.


No comments:
Post a Comment